Hey guys,
Man oh man, am I feeling these today! We are home safe and sound and soon I will be posting my packing blog, so you can see that bunch of fun.
Anyway, I distracted myself there.... today was day three, and afterwards, I;m actually feeling a little bit sick. It isn't a plesant feeling, let me assure you. I think I just need to drink more water before and after I do this, so that's what I will aim to do from now on.
I do this routine before bed, and I don't get too sweaty, but if it is an especially rough night, like tonight was, I do get quite nasty, and have to take a shower.
I got distracted again, so anyway, I am not feeling well, and I know the root cause of it, and I know how to rectify it, so I won't blab on about it more. I will say that I am very very sore and I can't beleive I am still doing this challenge, every night and that I have had the determination to do it, without any convincing or bribing from me or my husband!
Day 3:
25 sit ups
10 crunches
10 leg raises
15 second plank
( I will also note that yesterday, I was unable to properly do the 20 crunches I needed to, so I called it quits, and I did 25 today! Not only was I very happy that I was able to do them, but also very very sore.)
I hope you guys are finding this helpful. Again, this is just being copied out of my workout journal, the current ones will start tonight ( March 9th).
Warm wishes.
Sunday, March 9, 2014

Abs Challenge Day 2 (March 2, 2014)
Hey guys,
So today was day two of the 30 day abs challenge, and I have to say that it isn't as bad as I thought last night. Yes, it is hard work, but so far, I don't really feel sore and I don't really have the same fear of doing the reps as I did a few days ago, or even yesterday. It takes me about 3 minutes to do everything, so I haven't changed the way I eat or my pre- or post- workout food. Maybe that will change later, but so far it hasn't.
Day 2:
20 sit-up
8 leg raises
8 crunches
12 second plank
Warm wishes.
So today was day two of the 30 day abs challenge, and I have to say that it isn't as bad as I thought last night. Yes, it is hard work, but so far, I don't really feel sore and I don't really have the same fear of doing the reps as I did a few days ago, or even yesterday. It takes me about 3 minutes to do everything, so I haven't changed the way I eat or my pre- or post- workout food. Maybe that will change later, but so far it hasn't.
Day 2:
20 sit-up
8 leg raises
8 crunches
12 second plank
Warm wishes.
Abs 30 Day Challenge Day 1 (March 1, 2014)
Hello All,
So, this (was) day one of the 30 days ab challenge, and boy do I already (somewhat) regret doing this challenge. It was midnight and I had just gotten home from a Beefsteak with my family, so not only was I pretty full, but I was exhausted. And my husband just looked at me, and I knew that i had to get up. So, because the baby was asleep, I had to go into the bathroom and do my routine, cold tile and all. But I did it, and I was very happy with myself for even having the determination to do the first day, that's how intense this challenge is. (wait until you see day 8)
Day 1:
15 Sit-ups
5 crunches
5 leg raises
10 second plank
I will see you all tomorrow.
Warm wishes.
So, this (was) day one of the 30 days ab challenge, and boy do I already (somewhat) regret doing this challenge. It was midnight and I had just gotten home from a Beefsteak with my family, so not only was I pretty full, but I was exhausted. And my husband just looked at me, and I knew that i had to get up. So, because the baby was asleep, I had to go into the bathroom and do my routine, cold tile and all. But I did it, and I was very happy with myself for even having the determination to do the first day, that's how intense this challenge is. (wait until you see day 8)
Day 1:
15 Sit-ups
5 crunches
5 leg raises
10 second plank
I will see you all tomorrow.
Warm wishes.
Thursday, March 6, 2014
The 30 Day Abs Challenge
This is the 30 Day Abs Challenge I have been doing for almost a week now. It feels like a lot longer, but it will be a week on Saturday.

I was sitting here, writing another blog post, when I thought, why not share my experiences with the whole process with everyone else. A blog is a place for ideas to flow and let others, who might share your thoughts, ideas, or opinions, coneect with you. SO, why not share how I huff and puff and procrastinate and struggle and cry and heave and sigh through all of these challenges?
And even now, I sit here and write all of those reactions, but the reaction I seem to have the most is a huge smile plasted on my face whenever I accomplish a set. Every little set is a victory for me. I am sore, and tired, and even on days like today, sick, but I still smile at the end, becasue I have accompliched something that I didn't think was possible. Just in a few minutes.
Last month, if you had told me that I would be able to do 35 sit ups in one sitting, I would have laughed, and told you that you had the wrong girl. But I just did it! Me! Caitlynne Scagel, hater of all things aerobic (not really, but it does sound more dramatic that way) did 35 sit ups with minimal breaks. Before today, I couldn't even fathom doing 35 sit ups. And by the end of the challenge, I will be doing 180 in a workout. 180! That is insane! But I am actually very excited about it.
When I first found this Challenge on Facebook, I was like, okay cool, this starts out simple.
NOT!
Just to see where I was, I tried to do a sit up. I did two. Two. That's it. And day one of the challenge is 15! Fifteen.
I was going to quit, and to throw in the towel a full week and a half before I even started the month.
And then I said "No. I am better, stronger, and more determined that his. I will find a way." And I did.
The 5 days before the program, I worked myself up slowly to doing the first day's worth of reps.
This is what my schedule looked like:
Monday 24: 3 sit ups, 1 crunch, 1 leg raise, 6 sec plank
Tuesday 25: 6 sit ups, 2 crunches, 2 leg raises, 7 sec plank
Wednesday 26: 9 sit ups, 3 crunches, 3 leg raises, 8 sec plank
Thursday 27: 12 sit ups, 4 crunches, 4 leg raises, 9 sec plank
Friday 28: 15 sit ups, 5 crunches, 5 leg raises, 10 sec plank
This got me up to doing day one of the Challenge. Now, I know this may not seem like a lot at first, but the most important thing about this is, do what you can with the best for you can. If you hurt yourself because of bad form, that isn't you not being fit enough to exercise, that's you being lazy enough not to learn your form correctly. Even if you can only do one of everything, at least you know that you have worked the correct muscle groups.
Go online and watch some videos of people doing these exercises sot hat you can see how they are done properly. Learn hand positions and leg angles, and let yourself be taught. Listen and watch, don't just brush it off at a sit-up, it's an exercise, treat it like one.
I'm only on day six of thirty, and I am sore and tired and want to know what I was thinking, but I happy I am doing this, for my mind, and my body.
For me, this is the perfect exercise in non-instant gratification. While I am doing it, it sucks, and it hurts, and I want to whine like a baby, but when I suck it up and do what needs doing, I feel great, and I couldn't be happy, though I couldn't be more sore! And, I'm sure, after 30 days of doing this, I will see results at the end of March. At least I hope so. Let me know if you want pictures. I might post them irregardless. We will see.
Every day, I will update you on how I did, what I did, and how I am feeling. Some days might be longer than others. But, for the most part, you will see a lot of pain, and struggle, and frustration, but also a lot of confidence, and determination and resilience.
I hope this inspires you to hop off the couch and onto the floor or the gym or the road and challenge yourself. It's the only way you will know your boundaries.
I'm off to bed for the night, but I will post my ab diary in the morning.
Happy crunching!
Warm wishes.
Wednesday, March 5, 2014
A Very Simple Candle, made by YOU!
Hello all,
I am going to show you how to make a very simple candle.
All you need (and all these can be found at your local craft shop, I got all my stuff at Micheal's) is:
A metal (aluminum) container to melt wax in
 Wax
Wax
A jar
Fire safe adhesive
A wick
Dye
Scented oils, if you so choose
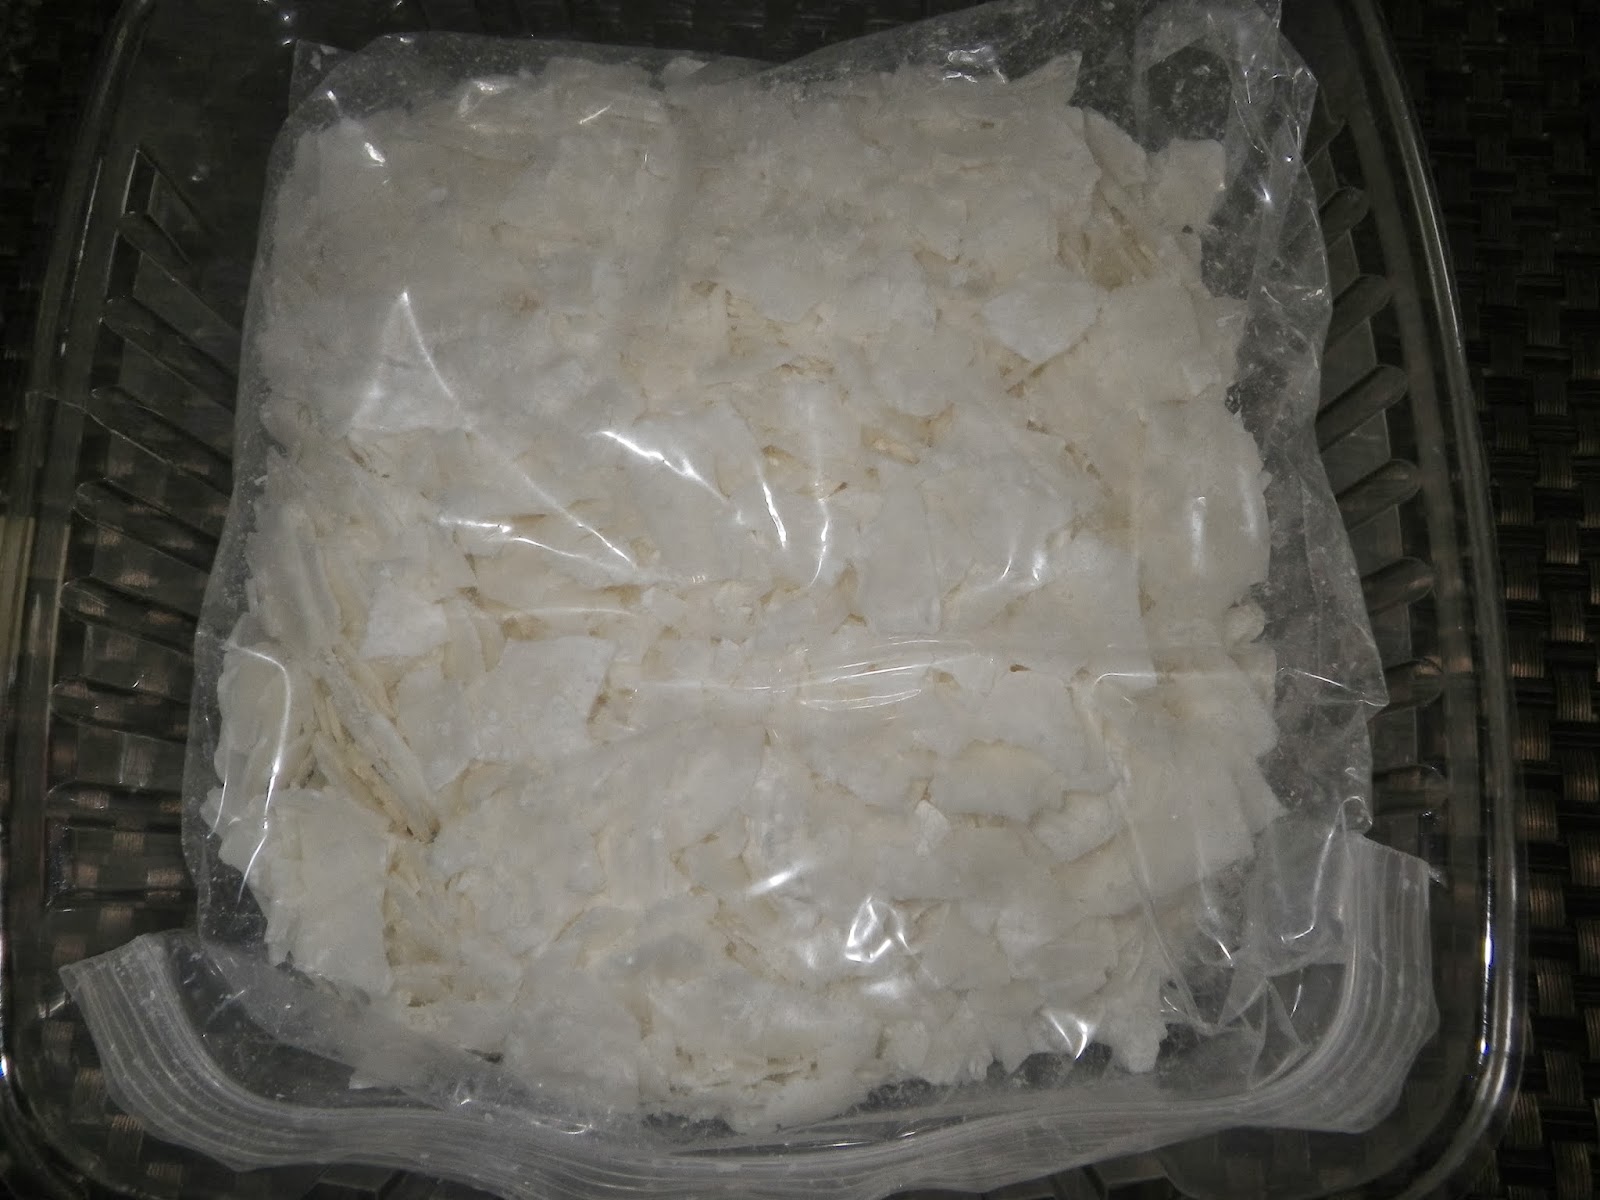

On low heat, melt your wax. I simply filled my jar up with wax flakes and then emptied it into the metal caraffe.
 While your candle wax is melting (it will happen quite quickly, so don't leave the room!!!) glue the wick to the bottom of your jar.
Hold it there for about a minute to let the glue set, and then give it until your wax is ready to pour to dry.
Once wax is fully melted, add in your dye. Be careful! A little goes a long way!

Then, while that is combining, give your candle wick a little tug to make sure it is in place.

If you find that your glue is not dry yet, hold off on pouring your wax. This will end badly. Instead, give the glue time to dry, about 30 minutes to an hour, and now you know for next time, that you need to glue your wick well in advance. If you need to give your glue time to dry, then take your wax off the stove, you can always remelt it later.
 Once your wick is in place, slowly pour your wax into the jar, making sure to avoid the wick.
Let the candle rest over night.
Light it and enjoy the beautiful home made candle that you made for your house.

Warm wishes.
I am going to show you how to make a very simple candle.
All you need (and all these can be found at your local craft shop, I got all my stuff at Micheal's) is:
A metal (aluminum) container to melt wax in
WaxA jar
Fire safe adhesive
A wick
Dye
Scented oils, if you so choose
On low heat, melt your wax. I simply filled my jar up with wax flakes and then emptied it into the metal caraffe.
While your candle wax is melting (it will happen quite quickly, so don't leave the room!!!) glue the wick to the bottom of your jar.Hold it there for about a minute to let the glue set, and then give it until your wax is ready to pour to dry.
Once wax is fully melted, add in your dye. Be careful! A little goes a long way!
Then, while that is combining, give your candle wick a little tug to make sure it is in place.
If you find that your glue is not dry yet, hold off on pouring your wax. This will end badly. Instead, give the glue time to dry, about 30 minutes to an hour, and now you know for next time, that you need to glue your wick well in advance. If you need to give your glue time to dry, then take your wax off the stove, you can always remelt it later.
Once your wick is in place, slowly pour your wax into the jar, making sure to avoid the wick.Let the candle rest over night.
Light it and enjoy the beautiful home made candle that you made for your house.
Warm wishes.
Glamglow!
Hello all,
Today is another edition of Beauty is on the Inside. I have a little bit of catch-up to do, so these next few posts will be quite quick, but hopefully still useful to you.
Today's post is about the GlamGlow mask. It is a mud mask that you can actually see pulling the oil out of your skin as it dries. It takes about 1 to put it on, 20 to let it work its magic, and 1 to take it off. It is so simple and so effective.
The jar is a great quality metal and ceramic jar that has GlamGlow on the side. The actual directions are in the packaging, so make sure you read those before you do the mask. It talks about the active ingredients in the mask, and you want to make sure you aren't allergic to anything in the mask. And, as with any mask, make sure you test the mask on your arm first, let it sit for 20 minutes, and then wash it off to make sure that the ingredients in the mask don't react on your skin.
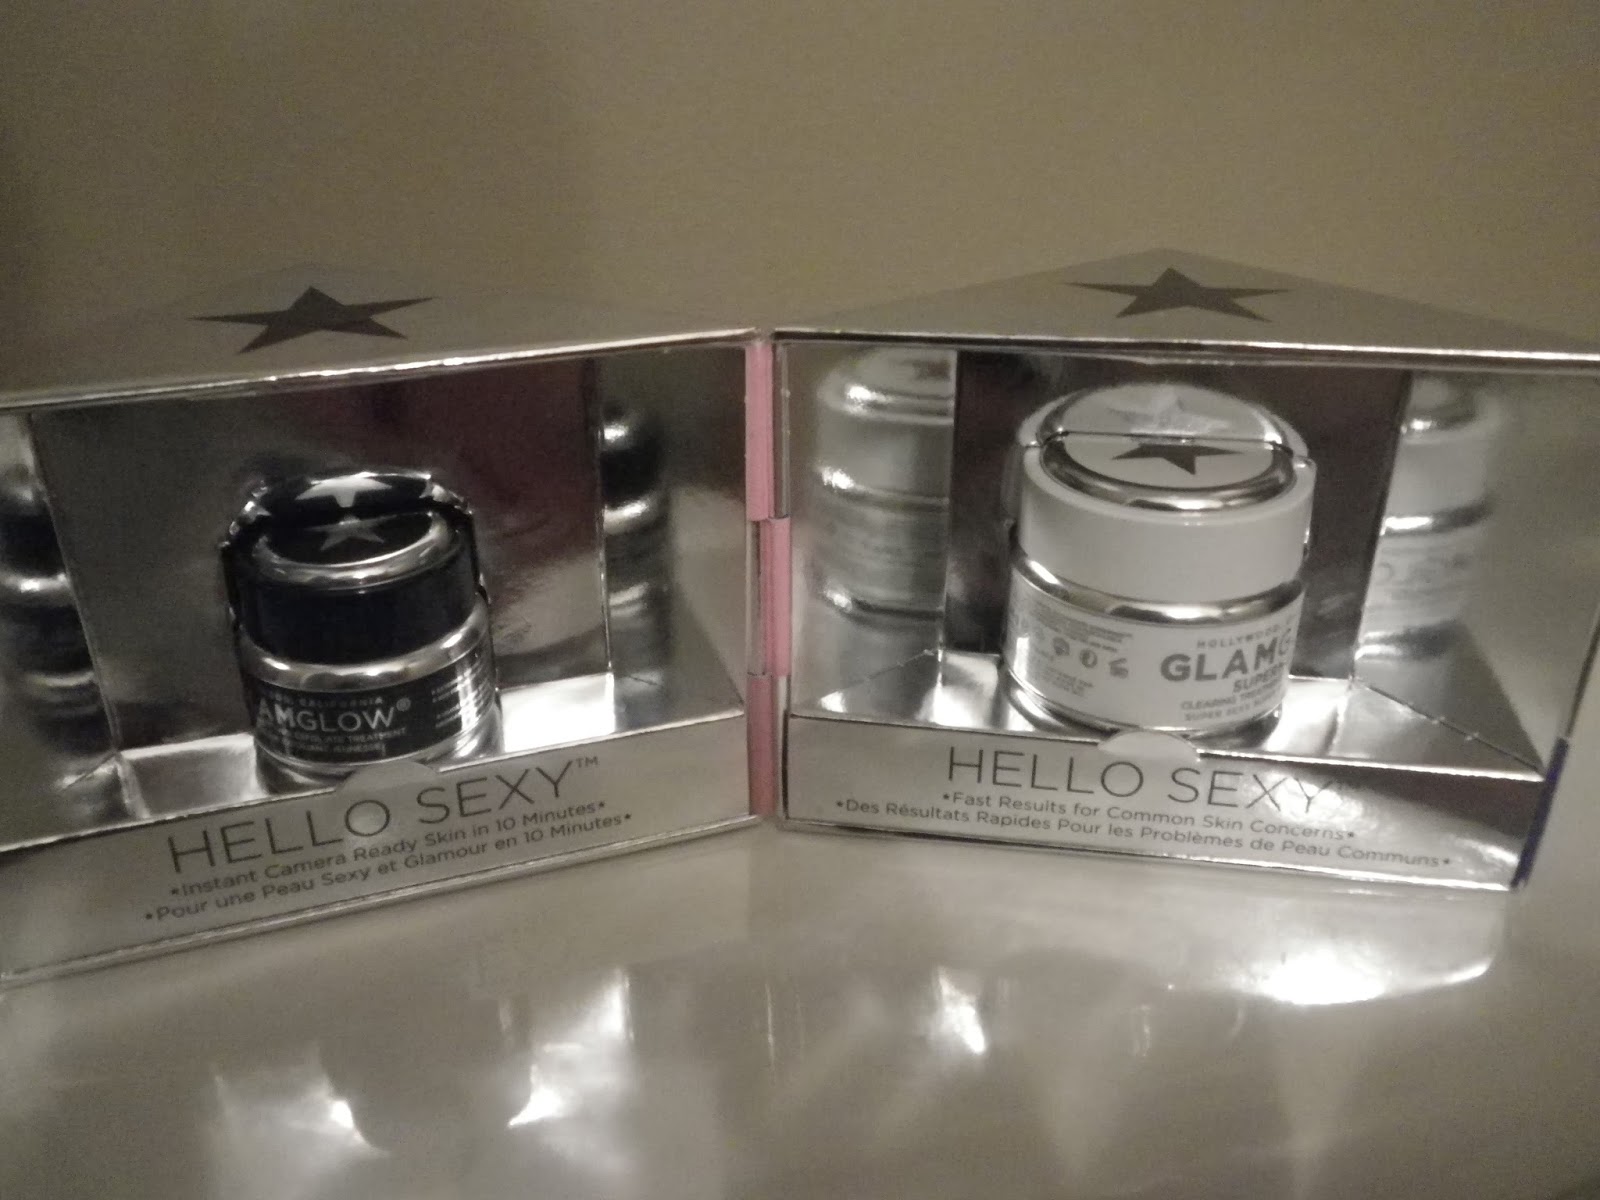
The jar is a 1 oz jar, and the packaging says you get 1000 spot treatments or 17 full face masks. It costs about $70.00 CND, and while that is a lot of money to spend on 17 uses, it really does work. I use the mask only about once a week, so for me, that is 17 weeks of product in one 1 oz jar. Which, if you think about it, is about $4.11 for a facial that you don't have to get a baby sitter for, get out of your pajamas for, and can go whenever you want, day or night, for 17 weeks straight. Not bad in my opinion.
I think that this product really works. I put it on my face and after it started drying, it immediately began pulling the oil u of my nose and cheeks and chin. I have horribly oily skin, so this product is lovely for me.
After, my face feel clean, and a little tight, which for me, makes me feel like I am getting a really great clean. I have gotten a facial or two in my time, and I have to say, this is almost as good.
 Of course, it feels great to have someone else massage your face and apply a mud mask and all you have to do is lie there and think of how great your skin will look after. But, I also feel so productive when I use this mask. Like the ultimate multitasking mom: she takes care of herself, while taking care of the house, the child and the dogs! You look a little silly at first, but then, your family will get used to mom looking like a mud monster while managing everything. Heck, you could even use that to your advantage to chase your kids around the house, like a mud monster of course. You'd burn some calories that way, for sure.
 So, to demonstrate the awesome powers of this mask, I will now put it on, let it sit for 20 minutes, and then take it off and supply you with before and after pictures of the whole process.
 First, I have cleaned my face with an exfoliant. I really want to open my pores and let the mask pull all the junk out of it that it can.

I use a brush. I was told to use a foundation brush, but I didn't have one at the time, so I use a paint brush from Micheal's. Yes, a paint brush. It never saw any action, and now it is my mud mask brush. Not only does it allow you to control your product better, it also allows you to regulate it much better, and you don't waste as much. Remember to wash your brush right after!!!
 Paint it all over you face in a THIN even layer. You do not need a lot of this stuff, I promise. Plus, the more you put on, the longer it will take to dry, and that means less time absorbing the oil because it is still trying to dry.
Let it sit for 20 minutes.


And see how it pulls all the oil and junk to the surface?
 EW
EW
 Nasty
Nasty
 Gross
Gross
 Disgusting.
 Now wash it off with water. DO not scrub it off! Your pores are very open right now, and if you scrub it in, you will be left with black pores because you will be pushing all the oil right back into your face. Wash it off with gentle circular motions with warm water.
After, use toner. I use about three cotton pads worth because I want to make sure I get all the oil on the surface of my skin off.
Then moisturize and you have lovely skin.
My skin feels great and I think it looks better that before I did the mask.
My make-up just slides right over my skin and it makes me feel like I have the prettiest skin in all the land.
That might be delusional, but hey, I'm not hurting anyone.


 I hope you all enjoyed the short review, and I hope to see you again on Friday for more Beauty is on the Inside.

Warm wishes.
Today is another edition of Beauty is on the Inside. I have a little bit of catch-up to do, so these next few posts will be quite quick, but hopefully still useful to you.


Today's post is about the GlamGlow mask. It is a mud mask that you can actually see pulling the oil out of your skin as it dries. It takes about 1 to put it on, 20 to let it work its magic, and 1 to take it off. It is so simple and so effective.
The jar is a great quality metal and ceramic jar that has GlamGlow on the side. The actual directions are in the packaging, so make sure you read those before you do the mask. It talks about the active ingredients in the mask, and you want to make sure you aren't allergic to anything in the mask. And, as with any mask, make sure you test the mask on your arm first, let it sit for 20 minutes, and then wash it off to make sure that the ingredients in the mask don't react on your skin.
The jar is a 1 oz jar, and the packaging says you get 1000 spot treatments or 17 full face masks. It costs about $70.00 CND, and while that is a lot of money to spend on 17 uses, it really does work. I use the mask only about once a week, so for me, that is 17 weeks of product in one 1 oz jar. Which, if you think about it, is about $4.11 for a facial that you don't have to get a baby sitter for, get out of your pajamas for, and can go whenever you want, day or night, for 17 weeks straight. Not bad in my opinion.
I think that this product really works. I put it on my face and after it started drying, it immediately began pulling the oil u of my nose and cheeks and chin. I have horribly oily skin, so this product is lovely for me.
After, my face feel clean, and a little tight, which for me, makes me feel like I am getting a really great clean. I have gotten a facial or two in my time, and I have to say, this is almost as good.
Of course, it feels great to have someone else massage your face and apply a mud mask and all you have to do is lie there and think of how great your skin will look after. But, I also feel so productive when I use this mask. Like the ultimate multitasking mom: she takes care of herself, while taking care of the house, the child and the dogs! You look a little silly at first, but then, your family will get used to mom looking like a mud monster while managing everything. Heck, you could even use that to your advantage to chase your kids around the house, like a mud monster of course. You'd burn some calories that way, for sure. 


I use a brush. I was told to use a foundation brush, but I didn't have one at the time, so I use a paint brush from Micheal's. Yes, a paint brush. It never saw any action, and now it is my mud mask brush. Not only does it allow you to control your product better, it also allows you to regulate it much better, and you don't waste as much. Remember to wash your brush right after!!!
Let it sit for 20 minutes.
And see how it pulls all the oil and junk to the surface?
EWNastyGrossDisgusting. Now wash it off with water. DO not scrub it off! Your pores are very open right now, and if you scrub it in, you will be left with black pores because you will be pushing all the oil right back into your face. Wash it off with gentle circular motions with warm water. After, use toner. I use about three cotton pads worth because I want to make sure I get all the oil on the surface of my skin off.
Then moisturize and you have lovely skin.
My skin feels great and I think it looks better that before I did the mask.
My make-up just slides right over my skin and it makes me feel like I have the prettiest skin in all the land.
That might be delusional, but hey, I'm not hurting anyone.
Warm wishes.
Monday, March 3, 2014
For the veggie lovers on this lovely Meatless Monday
Hey everyone!
About a month ago, my family started Meatless Mondays. It is healthy, light and still hearty. I love cooking meatless. It not only makes me feel a little better about what I am feeding my family, it gives me a lovely sense of satisfaction to know that I can please not only myself, but the total carnivore that my husband is with a huge plate full of hearty grains a vegetables.
This is a chili that my family has gone to for a meatless meal time and time again, even before we started meatless Mondays. It is rich, hearty, and full of rich spices and an earthy sweetness. it is deep and dark and rich and homey, and just so lovely with a dollop of 0% Greek yogurt, or even plain 0% yogurt and a piece of crisped bread or a biscuit. The nutritional information for this recipe is based on the chili and the yogurt, not the carb on the side.
I hope you enjoy this lovely chili and if you try it out, leave a comment or better yet, send me a picture!
Sweet Potato, Black bean, Chipotle Chili

Canola oil cooking spray
1 red onion, chopped
2 carrots, sliced on an angle
2 diced garlic cloves
1 TBSP chili powder
1 TBSP cumin
1 tsp paprika
1 tsp coriander (or fresh cilantro: 2 TBSP)
1 chipotle in adobo
2 (.5 lb) sweet potatoes, peeled and cut into 1 inch cubes
1 (28 oz) can diced tomatoes
1 (14oz) container of vegetable stock
1 (15 oz) can drained and rinsed black beans
1 (15 oz) can chickpeas, drained and rinsed
6 TBSP plain 0% yogurt (greek or regular)
For this dish, to get on the table quickly, I suggest peeling, chopping and collecting all of your ingredients while you heat your pan on medium low heat. This lets you multi-task and doesn't get your pan too hot while you work. Just watch your kids! They can be tricky, especially around hot stoves.
Chop your onion and carrots. Spray your pan and throw in your onion and carrots. You really want them to get lovely and soft and caramelized. About 5 minutes. Add in your spices and let them bloom only for about 1 minute. You don't want them to burn, just to bloom and become deliciously fragrant. Then add in your diced garlic. Lovely!
Then add in your chipotle in adobo, careful this is deep and dark and moorish and spicy. It really works well with all the lovely light and sweet flavors of the carrot and sweet potato. A little goes a long way. if you can't find this, then you can used ancho or smoked chili powder. Let that bloom for about 30 seconds.
Add in your sweet potatoes, your canned tomatoes and your stock. Let that boil for 20 minutes, then add in your beans. Let those simmer in the chili for about 10 minutes more and your chili is ready.
This dish serves 6. it is healthy and light and delicious but also filling and hearty and savory.
Portion out 1 and 1/3 cups of chili with 1 TBSP of yogurt and some cilantro leaves.
Good for any cold, wintery night, especially on Meatless Mondays!
Nutritional Information:
Calories 251
Total fat 3g
Carbohydrates 46 g
Sugar 12 g
Fibre 13 g
Protein 12 g
 Warm wishes.
About a month ago, my family started Meatless Mondays. It is healthy, light and still hearty. I love cooking meatless. It not only makes me feel a little better about what I am feeding my family, it gives me a lovely sense of satisfaction to know that I can please not only myself, but the total carnivore that my husband is with a huge plate full of hearty grains a vegetables.
This is a chili that my family has gone to for a meatless meal time and time again, even before we started meatless Mondays. It is rich, hearty, and full of rich spices and an earthy sweetness. it is deep and dark and rich and homey, and just so lovely with a dollop of 0% Greek yogurt, or even plain 0% yogurt and a piece of crisped bread or a biscuit. The nutritional information for this recipe is based on the chili and the yogurt, not the carb on the side.
I hope you enjoy this lovely chili and if you try it out, leave a comment or better yet, send me a picture!
Sweet Potato, Black bean, Chipotle Chili
Canola oil cooking spray
1 red onion, chopped
2 carrots, sliced on an angle
2 diced garlic cloves
1 TBSP chili powder
1 TBSP cumin
1 tsp paprika
1 tsp coriander (or fresh cilantro: 2 TBSP)
1 chipotle in adobo
2 (.5 lb) sweet potatoes, peeled and cut into 1 inch cubes
1 (28 oz) can diced tomatoes
1 (14oz) container of vegetable stock
1 (15 oz) can drained and rinsed black beans
1 (15 oz) can chickpeas, drained and rinsed
6 TBSP plain 0% yogurt (greek or regular)
For this dish, to get on the table quickly, I suggest peeling, chopping and collecting all of your ingredients while you heat your pan on medium low heat. This lets you multi-task and doesn't get your pan too hot while you work. Just watch your kids! They can be tricky, especially around hot stoves.
Chop your onion and carrots. Spray your pan and throw in your onion and carrots. You really want them to get lovely and soft and caramelized. About 5 minutes. Add in your spices and let them bloom only for about 1 minute. You don't want them to burn, just to bloom and become deliciously fragrant. Then add in your diced garlic. Lovely!
Then add in your chipotle in adobo, careful this is deep and dark and moorish and spicy. It really works well with all the lovely light and sweet flavors of the carrot and sweet potato. A little goes a long way. if you can't find this, then you can used ancho or smoked chili powder. Let that bloom for about 30 seconds.
Add in your sweet potatoes, your canned tomatoes and your stock. Let that boil for 20 minutes, then add in your beans. Let those simmer in the chili for about 10 minutes more and your chili is ready.
This dish serves 6. it is healthy and light and delicious but also filling and hearty and savory.
Portion out 1 and 1/3 cups of chili with 1 TBSP of yogurt and some cilantro leaves.
Good for any cold, wintery night, especially on Meatless Mondays!
Nutritional Information:
Calories 251
Total fat 3g
Carbohydrates 46 g
Sugar 12 g
Fibre 13 g
Protein 12 g
Warm wishes.
Subscribe to:
Posts (Atom)